ll manufacturing processes have limitations, as even machines aren’t able to produce shapes as smooth or detailed as designed. A raw 3D printed part isn’t going to be perfect, therefore some post-processing is almost always needed. This is the step that eventually leads to “Wow! How did you make that?” Sanding is the most common post-processing technique in 3D printing, but it’s also more labor-intensive than other alternatives.
At first, you might be overwhelmed by the thought of sanding for hours. Rest assured, there are techniques to get faster and more professional-looking results. Sanding PLA has some unique challenges, and it helps to start with a smooth print. In this article, we’ll discuss everything you should keep in mind when sanding your 3D prints as well as how to do it. So, roll up those sleeves, and let’s get to work.

3D Printing Post-Processing: PLA, PETG, ABS & More
SANDING 3D PRINTS: BEST TECHNIQUES TO SAND PLA & MORE
How to Print Smooth Parts

In order to avoid a lot of work later, it’s best to plan ahead to print parts that will be easy to sand. Everything from how you store filament to the settings you choose in the slicer can impact how much sanding your prints will require.
PLA, like most plastics, is hygroscopic, meaning it absorbs moisture from the air. Humid PLA going through the printer’s nozzle leaves a rough, inconsistent finish. It also leaves strings of material behind. New spools are shipped vacuum packed and with desiccant, so they aren’t a problem. Spools older than a few weeks, however, should be stored in a dry place or dried before printing.
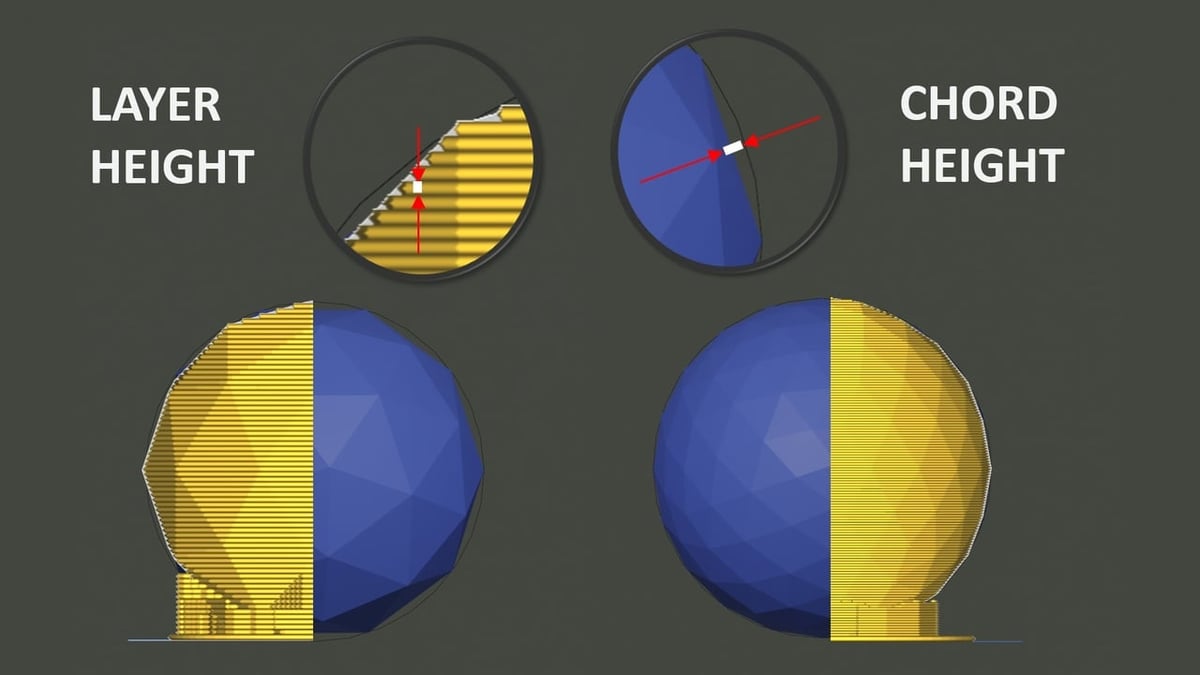
Even how you export your 3D model from your design software can have an impact on the final print’s surface quality. Chord height is the maximum allowable deviation the STL file will have from the source model. A lower number means the model will have a higher polygon count, which reduces the faceted corners seen on curved surfaces. When exporting STL files, keep the chord height much lower than the print layer height.
If you’ve downloaded an STL file from a sharing site like Thingiverse, you won’t be able to change chord height. Generally, STL files on repositories tend to have a decent resolution, so this isn’t something you need to worry about.
Slicer Settings

Once you’ve got a smooth STL file, keep the momentum going in the slicer. There are quite a few settings that can help reduce the amount of sanding required. Here are a few:
- Print orientation plays a role in surface quality. Supports are needed in overhang areas, making for a very rough surface. If possible, print with the good side up so there will be no visible traces of supports.
- Layer height should be set to your machine’s finer settings, within reason. A very low layer height can add a lot of print time but will produce a smoother finish. Shapes with vertical walls and flat tops are more forgiving with coarse layers than angled walls or domed tops.
- Wall thickness is very important for sanding. It’s good to have a little extra wall thickness in case you sand too deep. Otherwise, you could leave a hole or tear out pieces of filament. A thin wall will deflect as you sand, leaving an imprint pattern from the infill. Also, remember you’re going to be gripping the part tightly; a fragile part can easily break while handling.
- Print speed, if set too fast, can cause the printer to vibrate, leaving witness marks on the print. So, slow down the machine’s acceleration settings to reduce vibration.
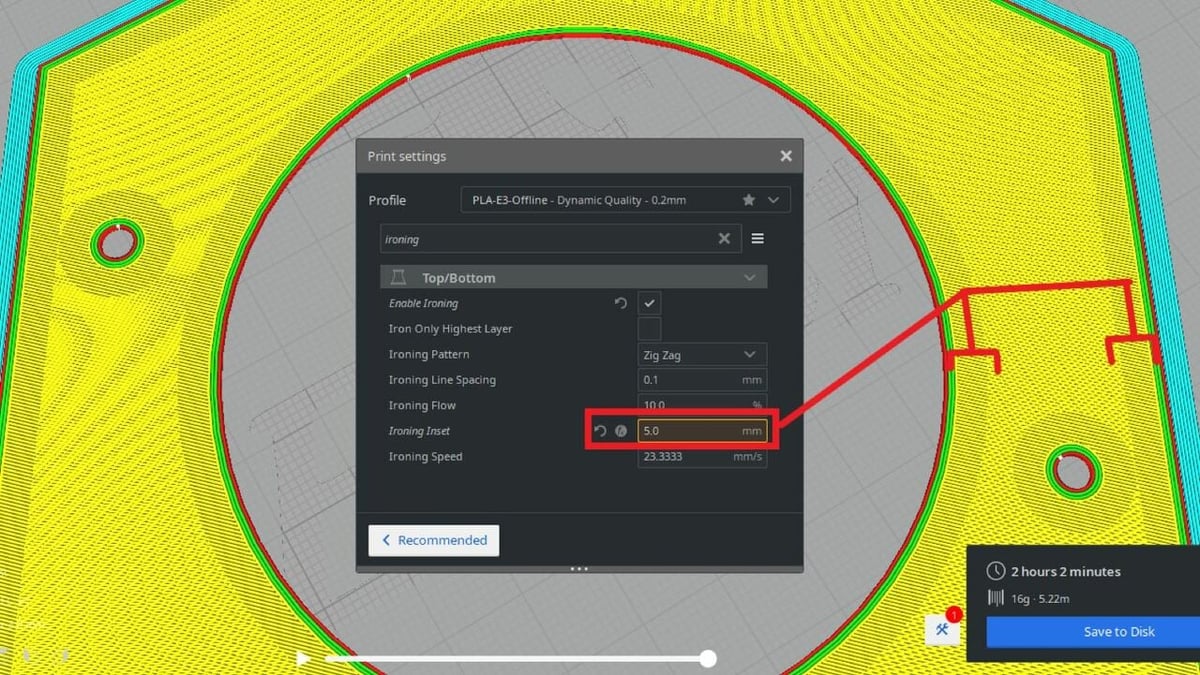
Unique slicer features can also help achieve a smoother 3D print. UltiMaker Cura and PrusaSlicer offer a feature called “ironing”, which smooths the top layers of the print. By running the printer nozzle over the top layer, the high points are smeared flat. You may have to experiment with the settings, but it can help smooth that top layer.


